7 Days To Die Base Design Tool
How To Build The Best Base in 7 Days To Die
From the moment you open your eyes to what is basically hyper realistic zombie Minecraft, your days are numbered. "7 Days to Die" is an open world survival horror game in which you, the player, must survive the elements and hordes of ravenous zombies hellbent on ending your life. You'll have to pillage, craft, and build to make it through the night.
The key to surviving even a single night in the early stages of the game is to fortify yourself in a fortress; leaving yourself in the open leaves you susceptible to zombie horde ambushes. Now you don't need to be a build heavy person as there are generated buildings that can be appropriated for your needs.
In the mode "Navezgane", a preset map is given to the player (Figure 1 below). In this preset world it is all about location, location, location. Below are the three best locations to settle in Navezgane.
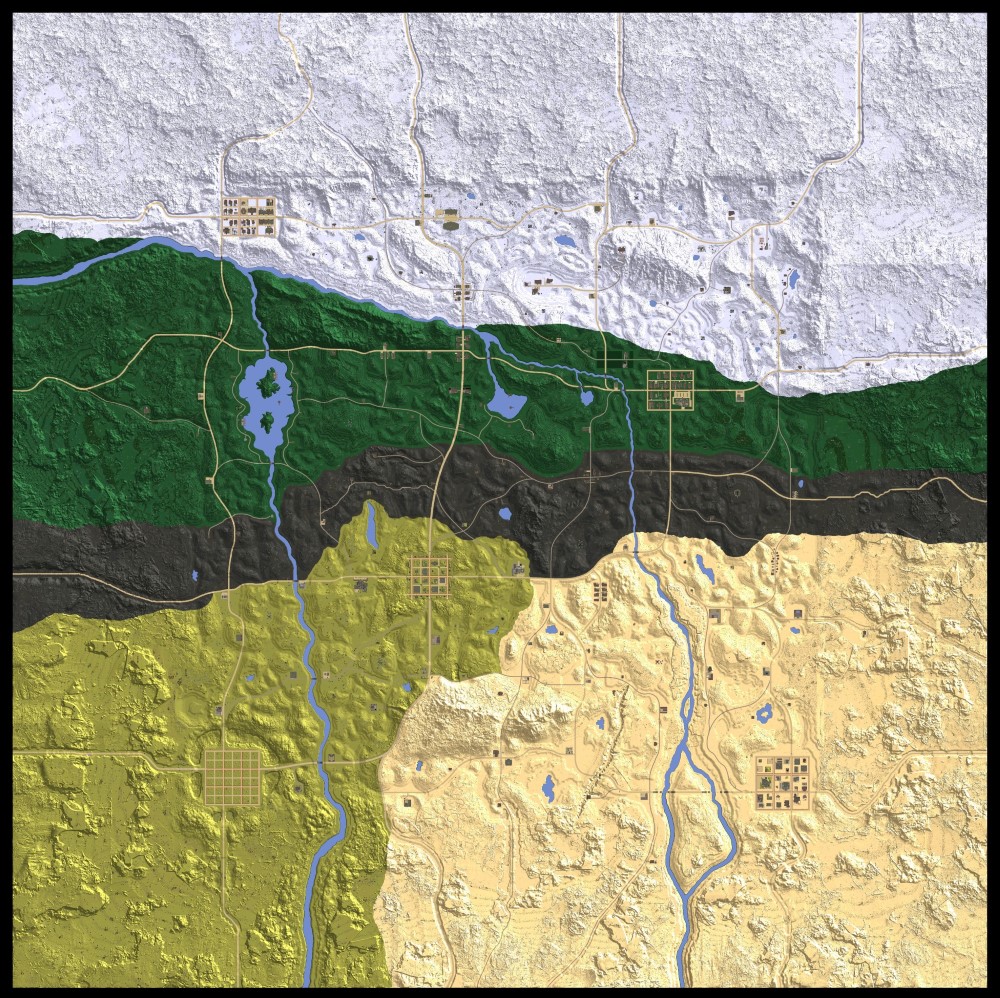
Figure 1.(Navezgane map ALPHA ver.17)
1: The Farm
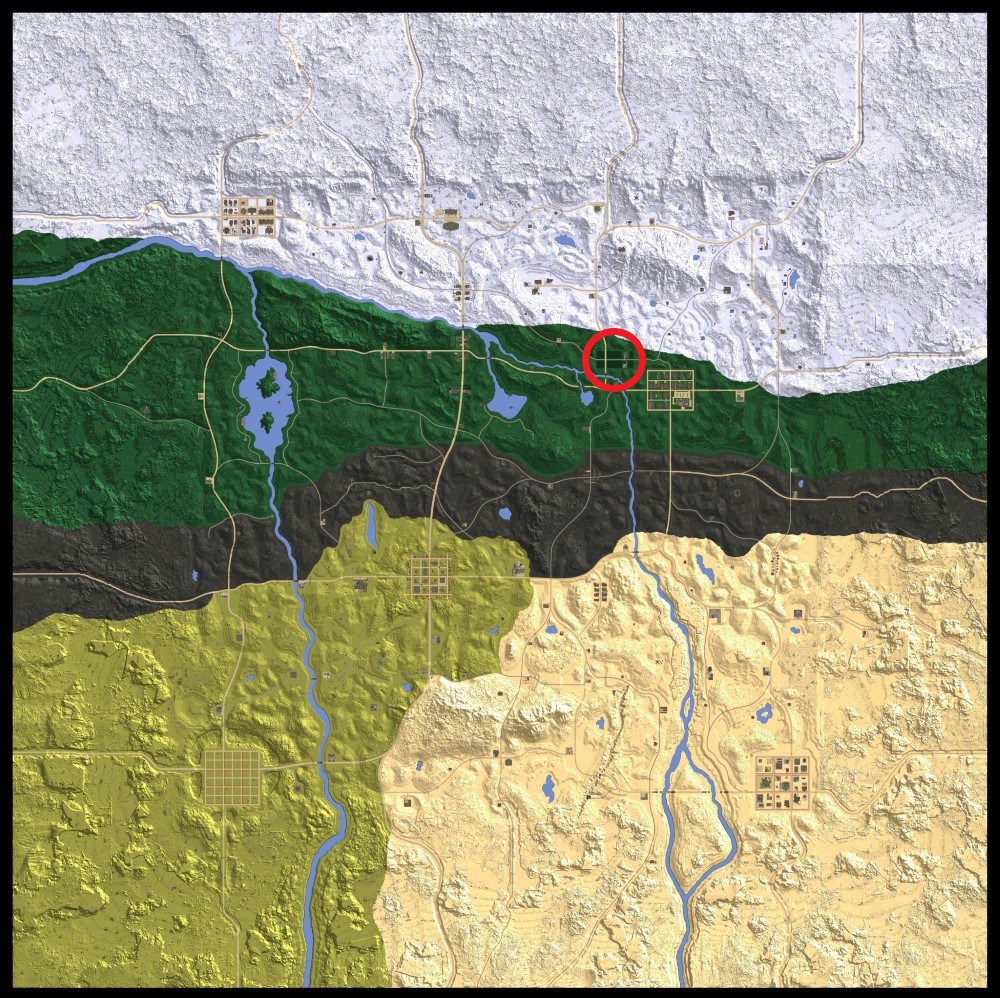
Figure 2.(Farm location)
The first place to settle into would be a small farm located in the northeast.
1. It is a safe place for beginners and it comes with buildings for shelter
2. It has farm area that can be used to grow crops
3.It is located west of a small town with a gas station nearby that you can loot
2: The Motel
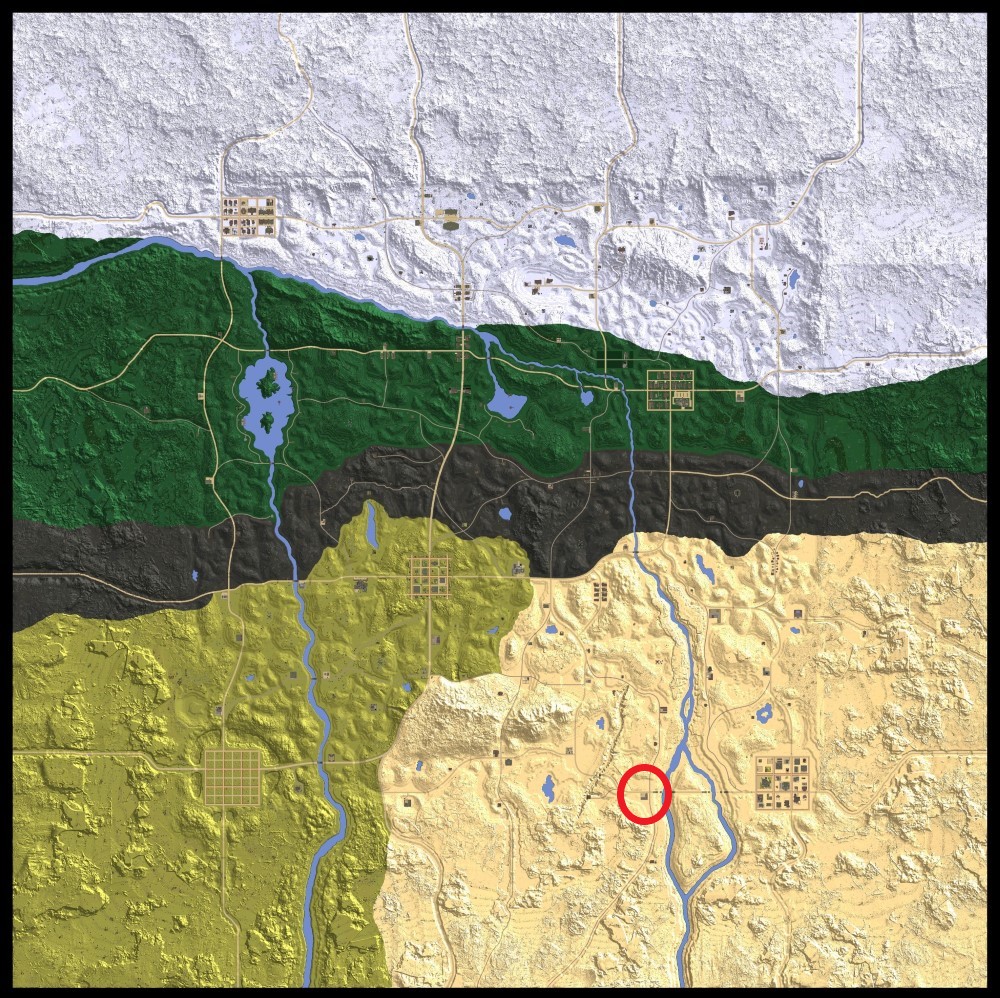
Figure 3.(Motel location)
The second place to settle is found in the desert in the southeast section of the map.
1. It is near a trader located to the north
2. It has a town located to the east for looting
3. There is an army station located to the west
3: The Crossroads
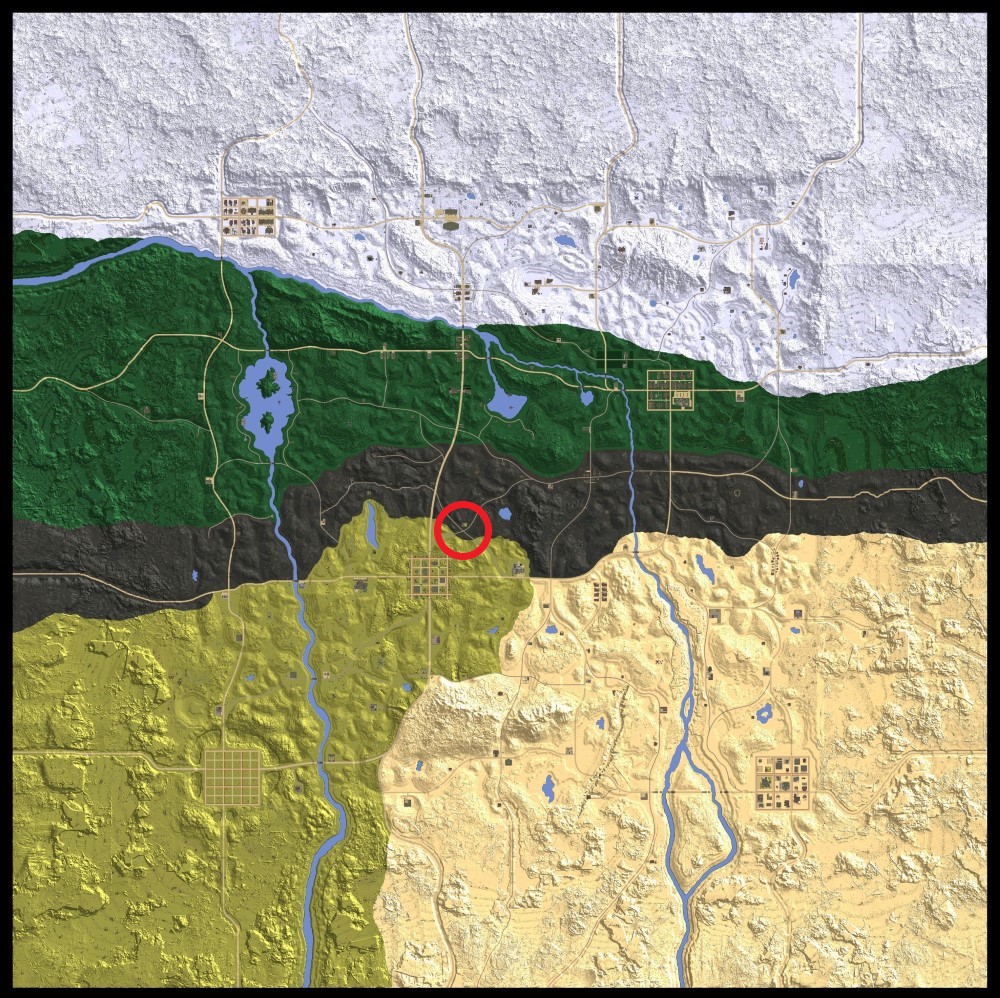
Figure 4.(Crossroad location)
The final location is for more experienced players but has really good loot if it can be retrieved.
1. One path will lead to a food factory and a drug store
2. One path leads into a town for looting
3. If you go past the town, that will lead to a shotgun factory where the player can find guns
Top Three Base Designs:
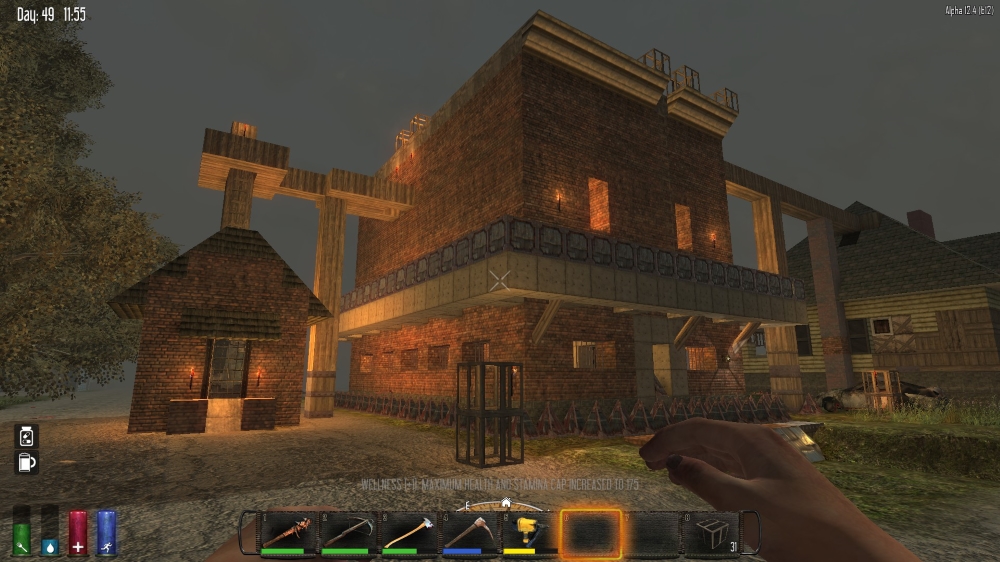
A well-built base
After choosing your humble habitat your next move is to build up some defense against the impending horde. There are three basic setups that will keep you perfectly safe.
1: HORDE Base
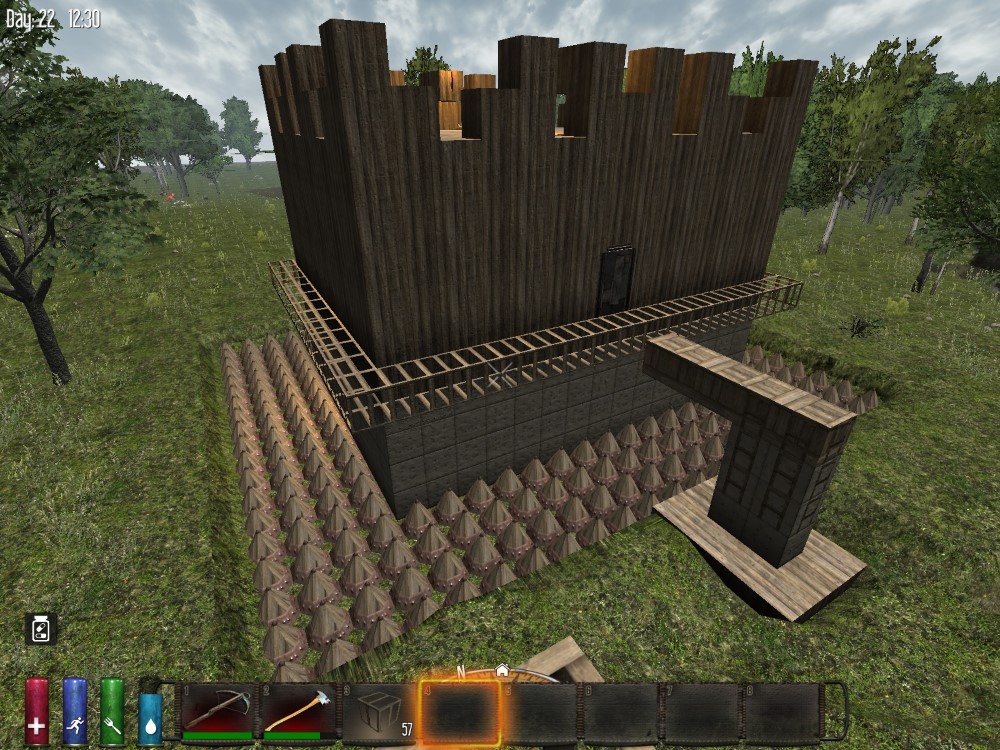
An example of the HORDE base
The first base pictured above is a basic horde setup for those who wish to have something else do the work. This simple and effective setup will make surviving a horde ambush much more streamlined and make your home base feel that much more safe and comforting.
The basic idea is to setup your home in such a way that the zombies will simply walk to their deaths due to the simple zombie AI. As you can see,a moat of spike traps does the trick as the zombies will walk on them to get to you and thus take damage. While this base will automate the process of dealing with the horde, there is a much simpler early-game strategy that can be adopted should you have enough projectiles. This setup is better for beginners as it utilizes early-game materials.
This setup will abuse the zombie AI mechanics causing them to freeze which allows you to just hit them until they are dead. This is done by using poles to create a structure for the player to walk on. The structure will look like a straight catwalk with one end being three blocks high and the other end being five blocks high. Each side has its defect; the lower side is rendered useless with the appearance of zombie dogs due to the fact that the zombie dogs are considered one block high.
Therefore, regular zombies can glitch on top of them and essentially walk on the dogs which raises the regular zombies' height to three blocks. Being just as high as the lower side the zombie will damage the structure but can be easily dealt with by moving to the higher side.The problem with the higher side is that police zombies can hit you with projectiles which damages your entire set up. This can be remedied by moving to the lower side and covering your base in plates so the police zombie AI does not have a clear shot. With the zombies right under you, they will freeze as they will have nothing to hit within the vicinity causing them to just stand there.
However, this simple setup is strict in the pieces that will be needed to complete it. The good news is, once it is setup, as long as it is being utilized properly, it will only need to be built once. Overall, 476 wood is needed to complete this horde base.
HORDE Base Full video guide:


For those who want a more powerful and complicated HORDE Base setup:


2: The Big Bad Badger Mole Base
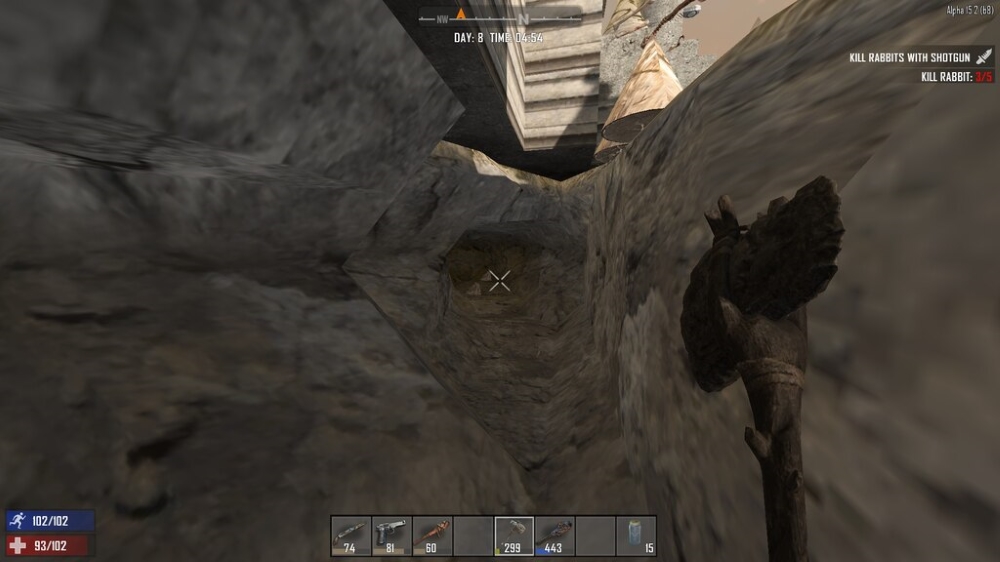
The natural home of the mole people
This design is simple and easy for anyone to do. As pictured above, a hole is made and the cave created will be the base. This is one of the best designs as zombies will scarcely spawn in underground areas compared to commandeering an abandoned hotel allowing for a crude yet peaceful home. While not the prettiest base, it is the most open for creativity.
With a blank slate and a bunch of iron shovels you can make yourself a happy little base. With the added terrain fluctuation, large underground cavern bases can be built. The upside to such a base is you can avoid most everything the game will throw at you even the hordes that spawn specifically to end your life.
Although in order for this to be achieved the player must dig to bedrock. If your base is any higher there is a chance the zombies will dig down into your little hobbit hole. There is also the downside of your base being where the sun don't shine....literally.
The Big Bad Badger Mole Base early game setup guide, watch the video below:


3: The Appropriator Approach
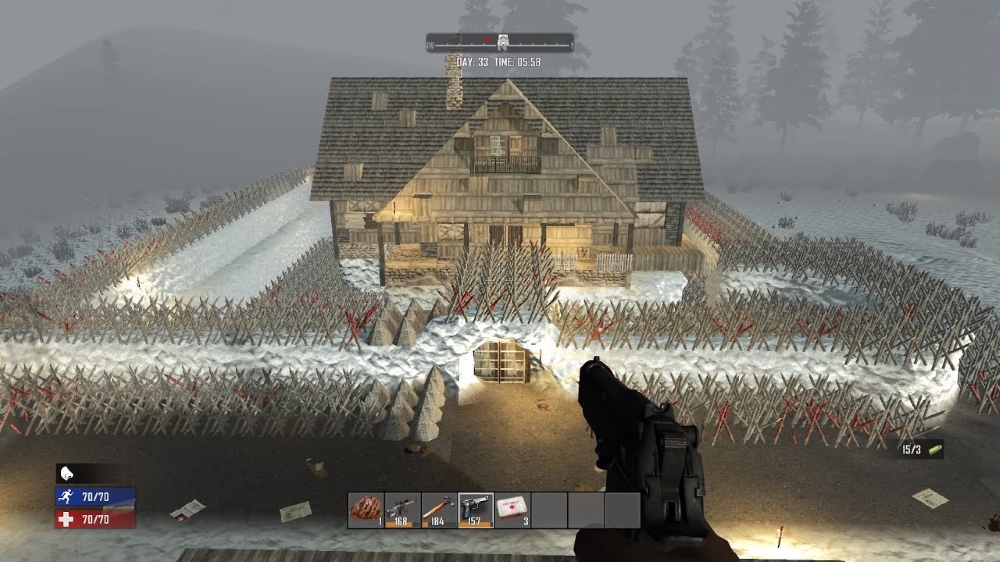
How to make friends 101
The easiest design follows a real life mindset when it comes to dealing with a zombie apocalypse. If tackled with a zombie apocalypse most people would agree that you should find somewhere to hold up. The same can be said for "7 Days to Die", so technically there is no design, simply conquer and fortify.
Why waste time building a base when you can simply move into another already built home and begin adding defenses to damage any trespasser on your newly acquired land. With the plethora of points of interests on the map each base can be different and come with its own perks and challenges. You could take over a simple home as pictured above living away from all that city life.
Even taking over a prison making it the one place no man/zombie will ever break into. A helpful guide on the basics of moving into one of the many generated POI is just one click away. This design will also be helpful if playing a random generated world as it is the simplest to start with.
The Appropriator Approach base design full video guide:


You may also be interested in:
- 7 Days to Die: Best Armor Set
- 7 Days to Die Best Loot Locations (Top 10)
- 7 Days to Die Best Ways to Level Up (Top 4 Methods)
- Top 10 Best 7 Days to Die Mods That Make the Game More Fun!
- 7 Days to Die: Best Traps (Top 5)
7 Days To Die Base Design Tool
Source: https://www.gamersdecide.com/articles/7-days-to-die-base-design-guide
Posted by: wommackcomplat.blogspot.com

0 Response to "7 Days To Die Base Design Tool"
Post a Comment